Many homeowners who create handcrafted goods, curate vintage collections, or run independent design studios eventually face a common problem: standard living rooms and basic desks cannot accommodate visual display needs. An ordinary spare bedroom or garage workshop often feels too dark or cluttered to showcase finished work in its best light. Transforming an unused room, wide attic landing, or flex space into a dedicated boutique showroom and staging room bridges the gap between craftsmanship and professional presentation.
A well-planned home showroom serves multiple everyday purposes. It provides a clean, organized sanctuary where you can arrange new inventory, assemble styled vignettes, host private client consultations, and prepare items for distribution. By balancing residential comfort and commercial visual merchandising, you create an inspiring environment that honors the care you put into your creative projects.
Planning Distinct Zones for Display, Staging, and Storage
Every successful remodel begins with clear zoning. Without a thoughtful floor plan, a creative room quickly becomes overrun with shipping boxes, loose tools, and scattered materials. Dividing the space into defined activity areas keeps the main display surfaces pristine while maintaining an efficient workflow behind the scenes.
When planning your layout, prioritize open sightlines from the entryway toward your primary feature wall. Keep walkways clear and reserve quiet corners for focused staging tasks. A functional showroom typically incorporates several core components:
- A central styling island positioned for comfortable movement on all sides.
- Perimeter shelving units and built-in architectural ledges for finished goods.
- Concealed cabinetry to store packaging supplies and seasonal styling props.
- A comfortable consultation corner for reviewing design samples and hosting visitors.
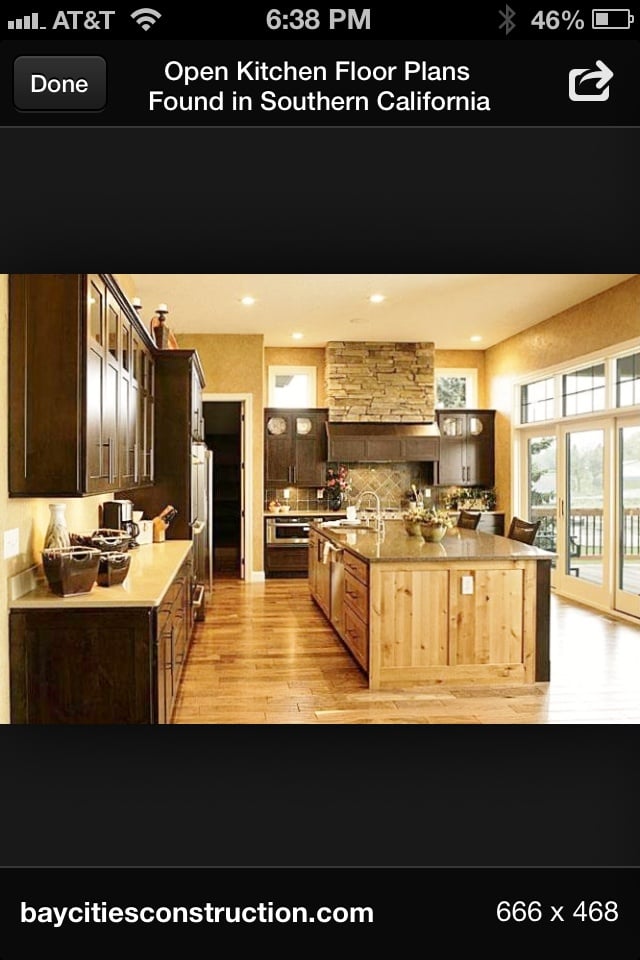
Locating a central staging island in the middle of the room provides complete access from every angle, allowing you to walk around an arrangement to inspect balance and proportions. Deep drawers beneath the counter keep everyday styling tools, dust cloths, and clamps within reach yet hidden from view.
Mastering Ambient and Directional Studio Lighting
Illumination can make or break a showroom. Natural daylight is prized for its organic color rendering, making rooms with large north-facing or east-facing windows ideal for this remodel. To manage shifting sunlight, install layered window treatments, such as sheer solar shades that diffuse intense glare paired with opaque drapery for controlled artificial lighting sessions.
Artificial lighting requires a layered scheme rather than a single ceiling fixture. Recessed ceiling luminaires with a high color rendering index provide balanced ambient illumination across the room. Adjustable track lighting or flush ceiling rails fitted with narrow-beam spotlights allow you to highlight specific shelves, wall displays, or furniture pieces without casting shadows on surrounding surfaces.
Managing several lighting layers is essential when transitioning between styling sessions, photography, and private appointments. When you want quick control over varied light fixtures, window motorized shades, and climate settings, operating your setup through a centralized smart home wall dashboard makes it easy to activate custom pre-programmed scenes with a single touch. This approach ensures your room shifts effortlessly from bright task illumination to warm ambient accent lighting whenever guests arrive.
Selecting Versatile Backdrops and Enduring Finishes
Because the primary goal of a home showroom is to celebrate your products, the architectural finishes should act as an elegant, neutral canvas. Overly saturated paint colors can create visual competition and distort the true tones of your items. Opt for warm whites, gentle stone greys, or muted clay tones that reflect natural light without creating unwanted color casts.
Texture adds character while preserving neutrality. Consider applying subtle mineral paint, Venetian plaster, or smooth limewash to a feature wall. These artisanal wall treatments impart organic depth and tactile richness to your background without introducing busy patterns. Flat or matte paint sheens work best across general walls and ceilings, as gloss finishes produce distracting glare under studio lights.
Flooring selections should combine durability with aesthetic warmth. Wide-plank hardwood treated with a low-sheen matte sealer provides natural elegance, while engineered vinyl plank or polished concrete offers exceptional scratch resistance if you frequently move display tables, plinths, or tripods. Neutral area rugs with low pile can soften the room acoustically while anchoring seating areas.
Designing Flexible Product Displays and Vignettes
Static displays quickly feel tired, especially when your collection evolves with new seasons and bespoke projects. Build flexibility into your room renovation by incorporating modular display systems. French cleat wall systems, adjustable brass shelf standards recessed into custom millwork, and floating display ledges let you reconfigure shelf heights whenever you introduce items of differing sizes.

Freestanding display pedestals in assorted heights add visual depth and height to corners and open floor areas. These plinths can be painted to match the wall color for a seamless gallery look or finished in light oak or honed stone to provide subtle material contrast. Movable styling boards made from marble remnants or textured tiles can be brought to the island to test different surface combinations.
Curating these vignettes is also essential for sharing your work with a broader community of enthusiasts and clients. When refining how you compose and share visual stories of your finished pieces across online channels, discovering helpful styling suggestions and creator insights on InstaGTrends can help you present your curated arrangements effectively to social audiences. Pairing thoughtful physical staging with consistent visual presentation helps your work resonate far beyond your home.
Connecting the Physical Studio to an Online Storefront
A beautifully remodeled showroom serves as the physical anchor for your creative venture, but for modern makers and curators, it represents only part of the total experience. The displays, color palettes, and aesthetic choices you establish within the room should translate directly into your broader digital footprint, providing clients with a consistent impression whether they visit in person or online.
Take time during the renovation to integrate cable management, dedicated camera mount points, and subtle power outlets near your staging counters. Having flush-mounted pop-up power outlets built directly into your island surface allows you to plug in auxiliary lights, laptops, and label printers without trailing cords across walkways. This integration keeps the room looking like a calm boutique rather than an active workshop.
Translating the high standards of your physical showroom into an intuitive online shop or portfolio requires thoughtful digital design. If you are developing an independent platform to display your catalog, exploring the detailed web design advice and technical articles on justanotherdeveloper.net can assist you in building responsive galleries, clean page layouts, and user-friendly digital storefronts that mirror the refined quality of your remodeled space.
Remodeling a boutique home showroom and product staging room transforms how you celebrate and present your creative work. By investing in versatile spatial zoning, layered architectural lighting, understated textured finishes, and flexible modular displays, you create a private retreat that balances functional utility with refined elegance. This dedicated environment elevates your daily routine and gives your craft the permanent, dignified home it deserves.